Électricité statique,
précautions nécessaires !
Les transistors à effet de champ ("FET") sur ce module peuvent être détruits par l'électricité statique. À vous de prendre des précautions !

ESD measures in effect!
Field Effect Transistors (FET) in this module can be destroyed by static discharges.
Exposer la plaquette
Gaining access to circuit board
Removing 8 screws from the unit cover will suffice: no need to extract the module out of the transverter box.
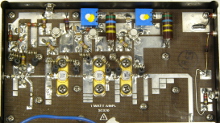
État des lieux avant les modifications
Photo #

Appearance before modifications
Depending on the original frequency, some traces may already be bridged, either with solder or silver paint.
Survey the work you need to do carefully.
NOTE: tuning ultimately depends on the characteristics of the devices in your unit. The following should get you in the ball park, but may have to be optimized.
Détails de la syntonisation
Photo #

Tuning chart
Avoid using too much solder in establishing bridges.
If a bridge cannot be made with solder alone, use a narrow piece of copper foil to bridge a gap.
Bridge or separate all tuning segments per the following instructions.
- Series A: join all segments.
- Series B: join all segments + add a 3 mm × 3 mm foil area.
- Series C: join all segments + add a 1.5 mm × 4 mm foil area.
- Series D: join all segments, except the last.
- Series E: join all segments.
- Series F: join the first segment only.
- Other series: remove any bridge that was not called for explicitely above.
Illustration includes lengths of the tuning sections in millimetres.
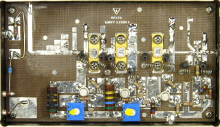
Plaquette, après modifications
Photo #

Circuit board after modifications
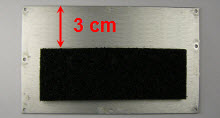
Enlever une partie de la mousse
Photo #

Trimming the foam
By creating a bridge between amplifier stages, this foam was the cause of an instability on the prototype.
- Prepare to trim the top portion of the foam:
- i.e., the section which fits over the DC bias circuitry (resistors, potentiometers, plain transistors).
- Notice the dimples in the foam caused by pressing against the components.
- The section to be removed is also closest to the rear heatsink.
- Ensure the top 3 cm, as measured from the edge of the cover, are free of foam.
Vérification
Test output power
Verify the amplifier does not put out any RF when energized (DC) without an input signal: such RF would stem from a parasitic oscillation.
With an input of 0.5 mW, the power amplifier should put out 1 watt or more.
Otherwise, tuning may have to be tweaked by removing/adding "flakes" on the tuning sections.